

How To Install Tensorflow On Windows 10
How to Finally Install TensorFlow two GPU on Windows 10 in 2022
Works 100%!
I think Windows users, including me, take suffered plenty. You lot are probably stumbling on this later trying hours or fifty-fifty days to make this piece of work. So, as a kindness, I will just cut to the chase and show you the steps yous need to install TensorFlow GPU on Windows x without giving the usual weblog intro.
Footstep 1: Find out the TF version and its drivers.
The first, very important step is to go to this link and decide which TF version you desire to install. Based on this, the CUDA driver versions and other software versions modify.
As of writing this guide, TF two.vi.0 is the latest, and we will be installing that ane.
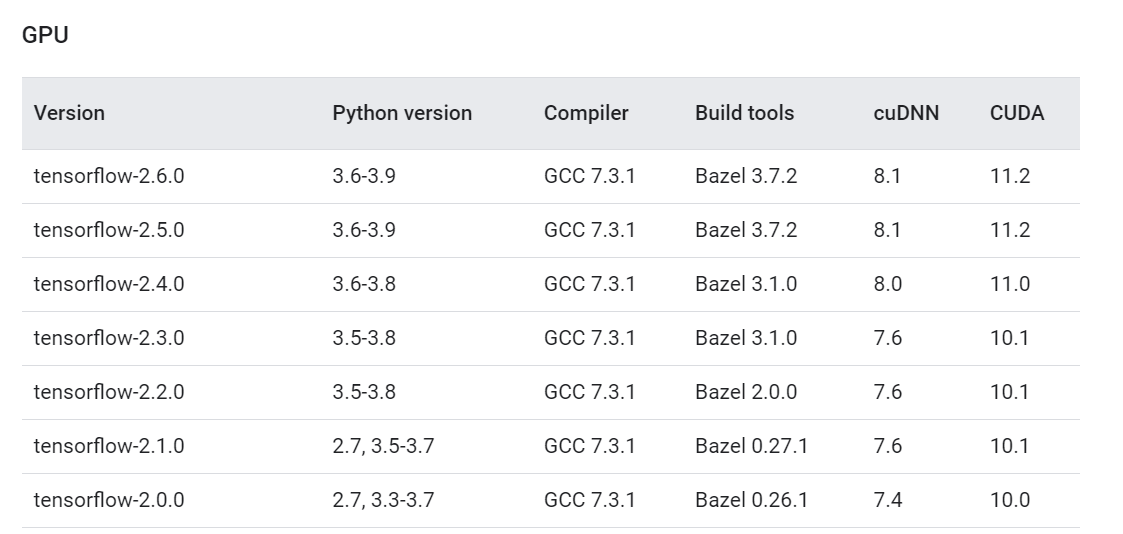
We are just interested in the TF version, cuDNN, and CUDA versions. We keep this tab open up and movement on to the next step.
Step 2: Install Microsoft Visual Studio
Adjacent, nosotros install Microsoft Visual Studio. Notation that this ane is different than Visual Studio Code, which is a lightweight IDE and then many people beloved.
Go to this link and press download:

Run the downloaded executable and it will take a minute to download the requirements. And so, it will enquire you to choose what workloads to install. We don't want whatsoever, so merely click install without workloads and click proceed. After the installation is done, it will ask you to sign in but you lot don't take to.
Step 3: Install the NVIDIA CUDA toolkit
NVIDIA CUDA toolkit contains the drivers for your NVIDIA GPU. Depending on your Windows, they may or may non be already installed. If installed, we should cheque their version and run across if they are compatible with the TensorFlow version we want to install.
Go to your Settings on Windows and choose "Apps & Features". And so, search for NVIDIA:

Nosotros want to install TF two.6.0 which requires NVIDIA CUDA Toolkit version 11.ii (see the commencement link to double-check). If your drivers are whatever other version, delete all the ones that accept "NVIDIA CUDA" in their title (get out the others). Then, go to Local Deejay (C:) > Program Files > NVIDIA GPU Computing Toolkit > CUDA. There, you will see a folder with the CUDA version as a name. Delete that folder.
If you search for NVIDIA and no CUDA toolkit is constitute, get to this page. Hither is what it looks similar:
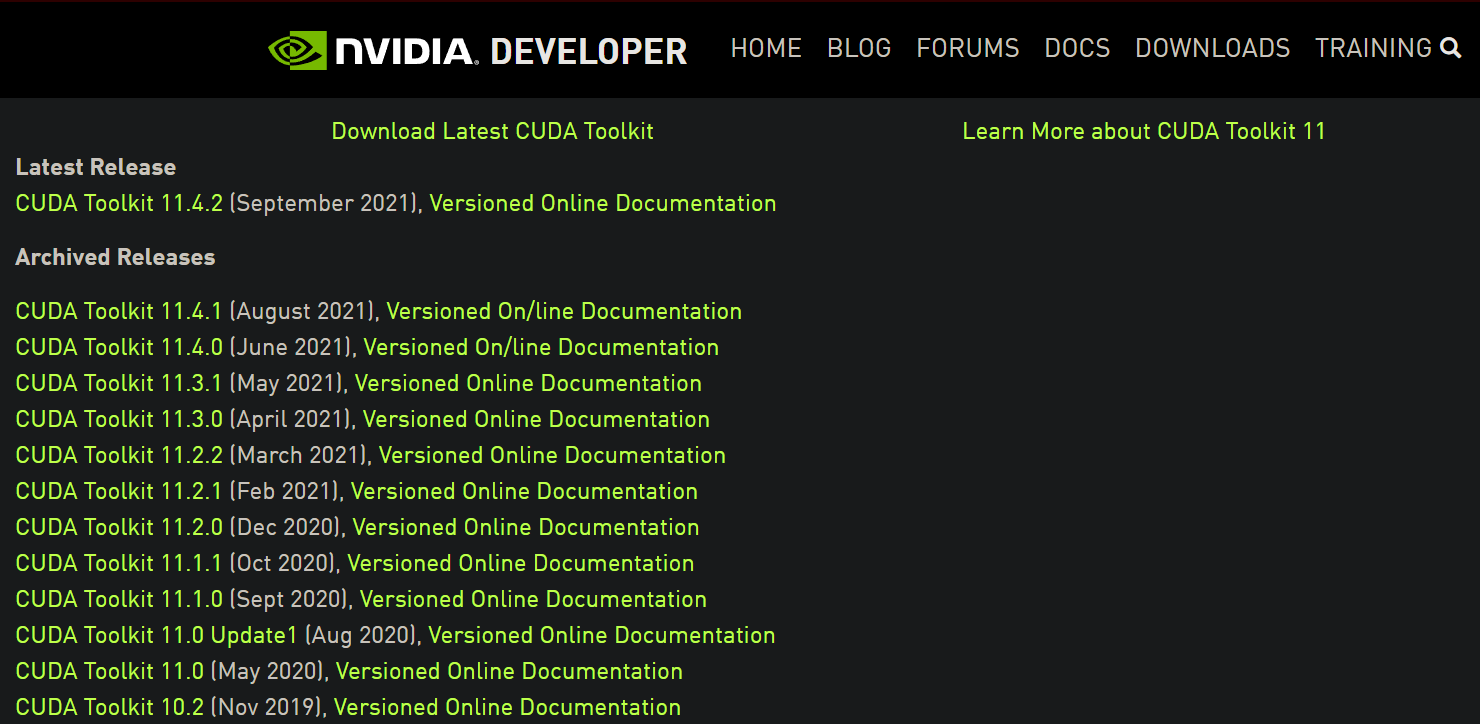
Here, we see three eleven.2 versions, which are what we need (we got the version from the first TF version link I provided). Click on any of them and choose Windows 10, and download the network installer:
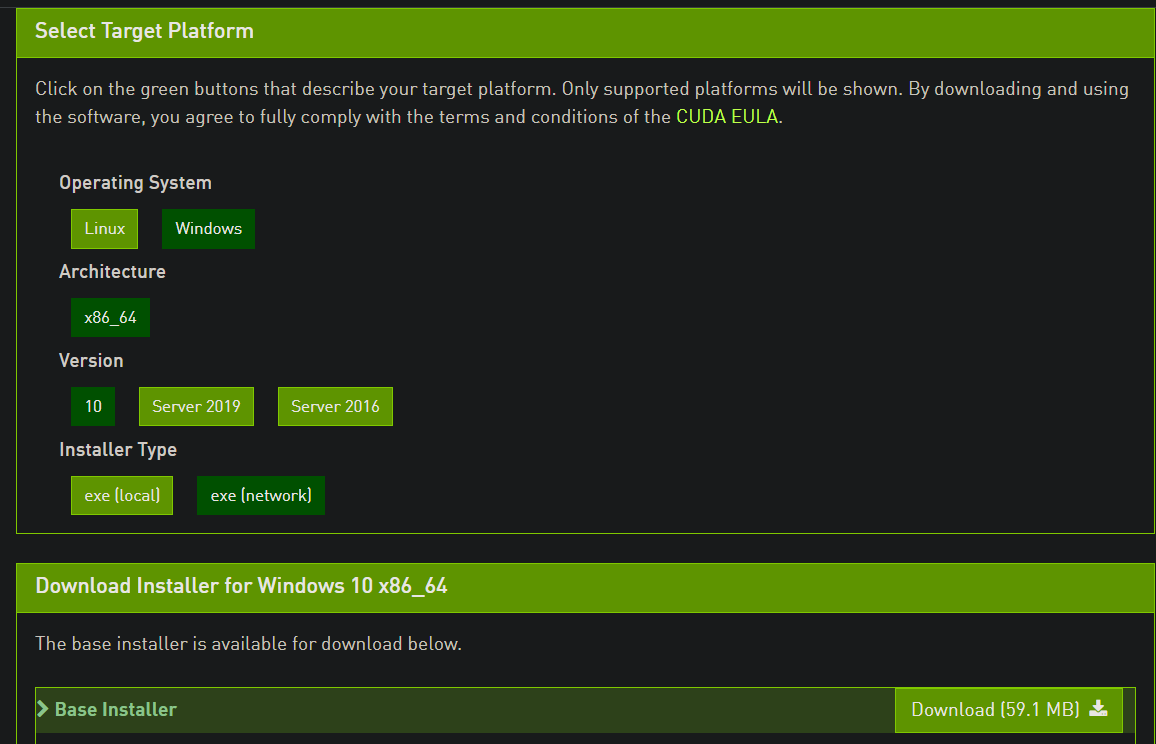
Follow the on-screen prompts and install the drivers with default parameters. Then, restart your figurer and come up back.
Step four: Install cuDNN
For TensorFlow 2.6.0, cuDNN 8.one is required. Go to this folio and press download:

Information technology will inquire you for an NVIDIA Programmer account:

If y'all don't take an business relationship already, click "Join at present" and enter your email. Fill up up the form — the standard stuff. So, go back to the cuDNN download folio:
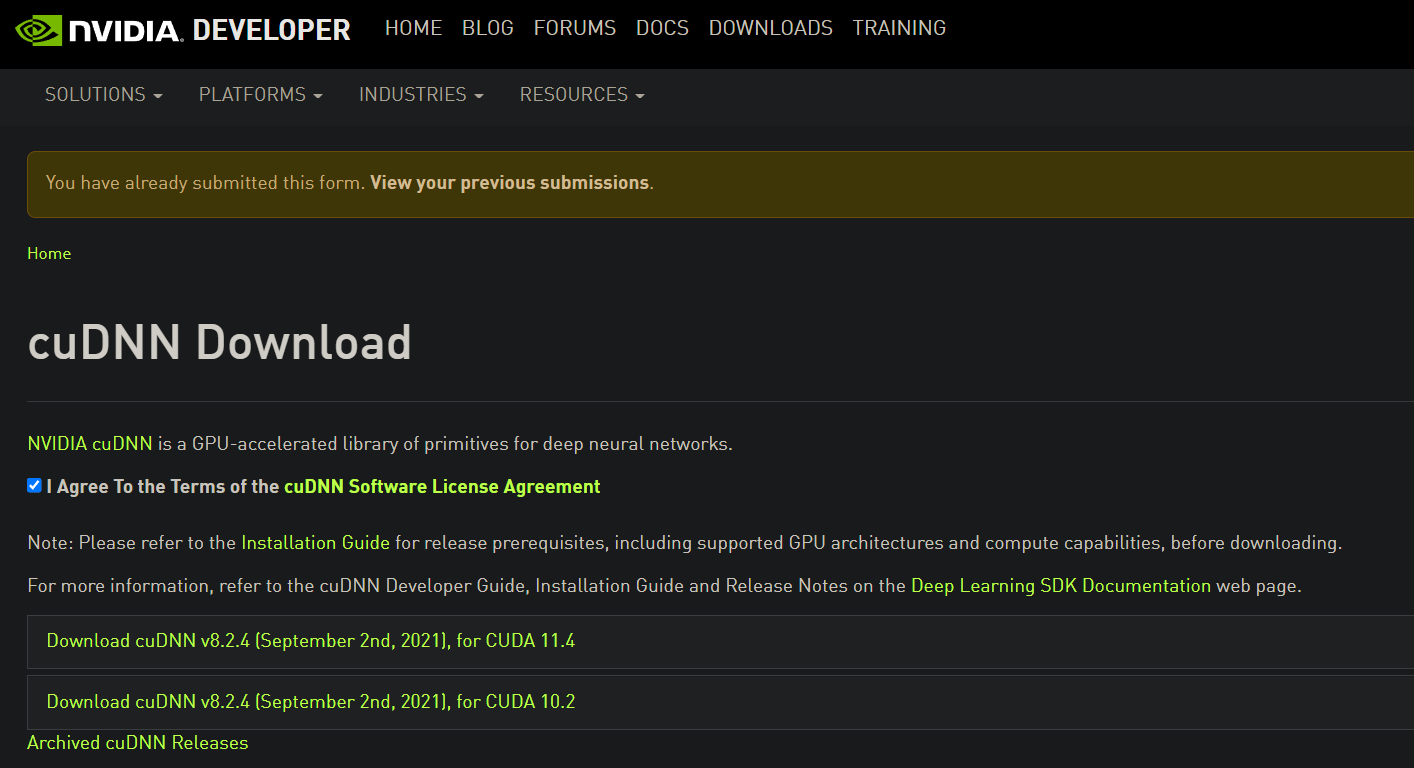
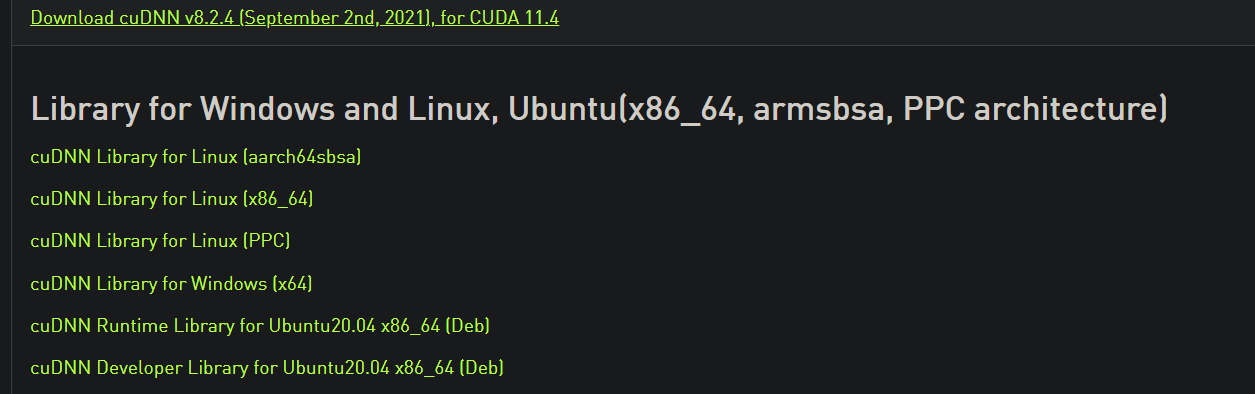
At the top, it will ask you lot to fill up out a survey. Fill it out and you will be presented with the above folio. Click on the first one since it is the 1 compatible with CUDA Toolkit v. 11.*. At that place, you will see a Windows version, which yous should download.
Step 5: Extract the ZIP folder and copy cadre directories
Extract the downloaded Goose egg folder:

Open the cuda folder and re-create the iii folders at the acme (bin, include, lib). Then, get to C:\Program Files\NVIDIA GPU Computing Toolkit\CUDA\v11.2 and paste them there.
Explorer tells you that these folders already exist, which you should press Supercede the files in the destination. That's it, we are done with the software requirements! Restart your computer once over again.
Step 6: Add together CUDA toolkit to PATH
Now, it is time to add a few folders to the surroundings variables. In the concluding destination, C:\Plan Files\NVIDIA GPU Computing Toolkit\CUDA\v11.2, in that location is a bin and folder:

Open information technology and copy the file path. And so, press the "Start" (Windows) button and type "Surroundings variables":
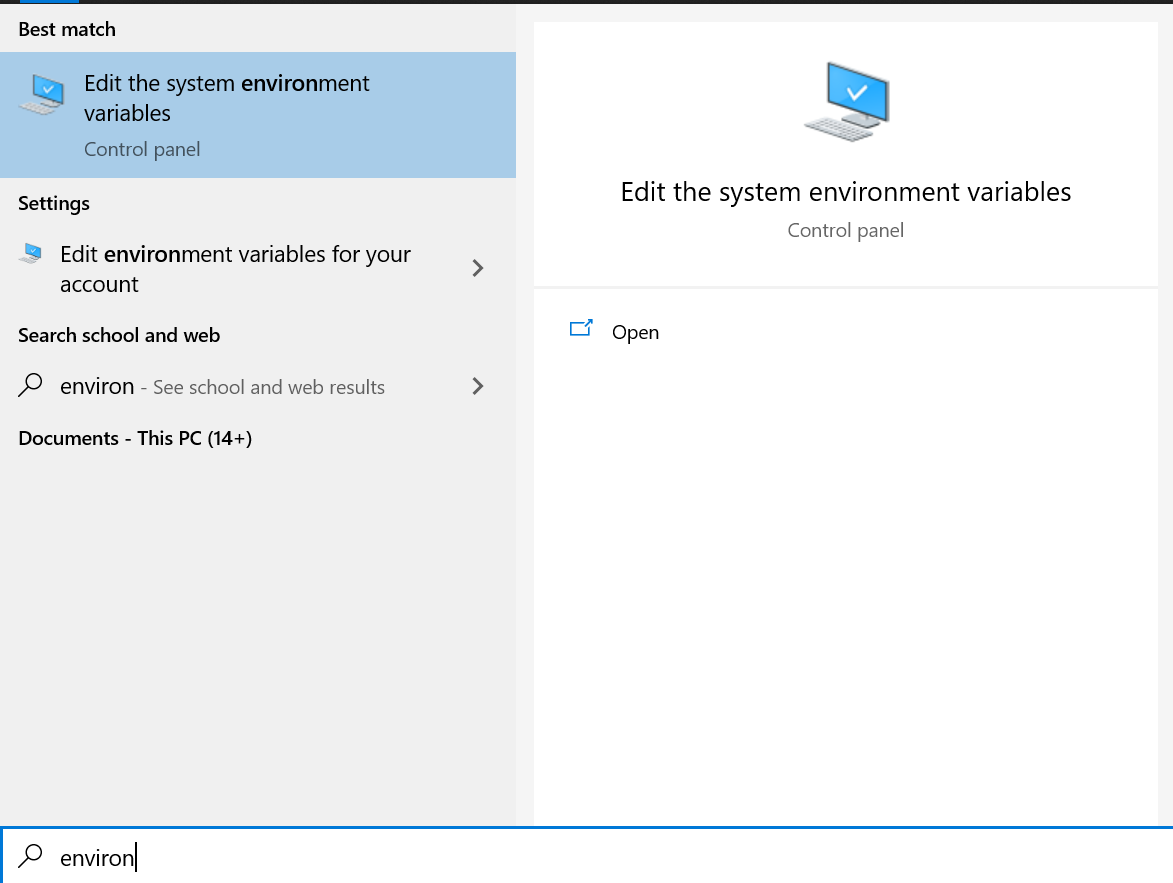
Open up it and go to "Environment variables". This will open up this pop-up window:
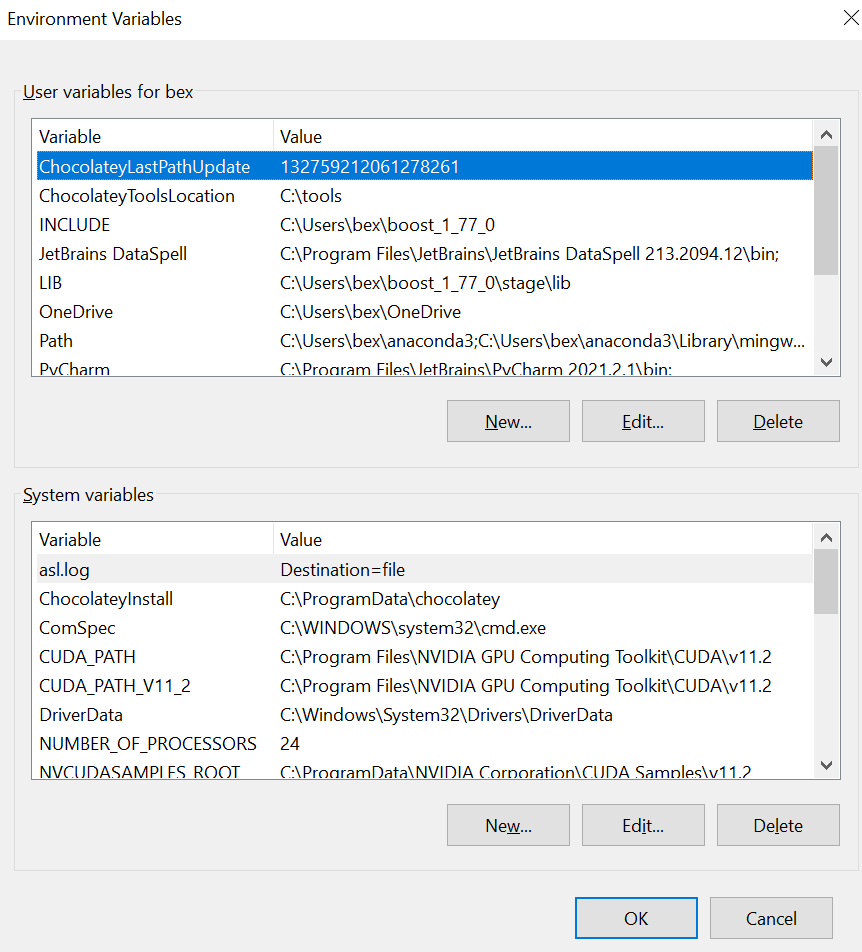
Choose the "Path" from the top and press edit. Press "New" and paste the copied link there.
Then, become back to the GPU toolkit folder and open up the libnvvp folder:
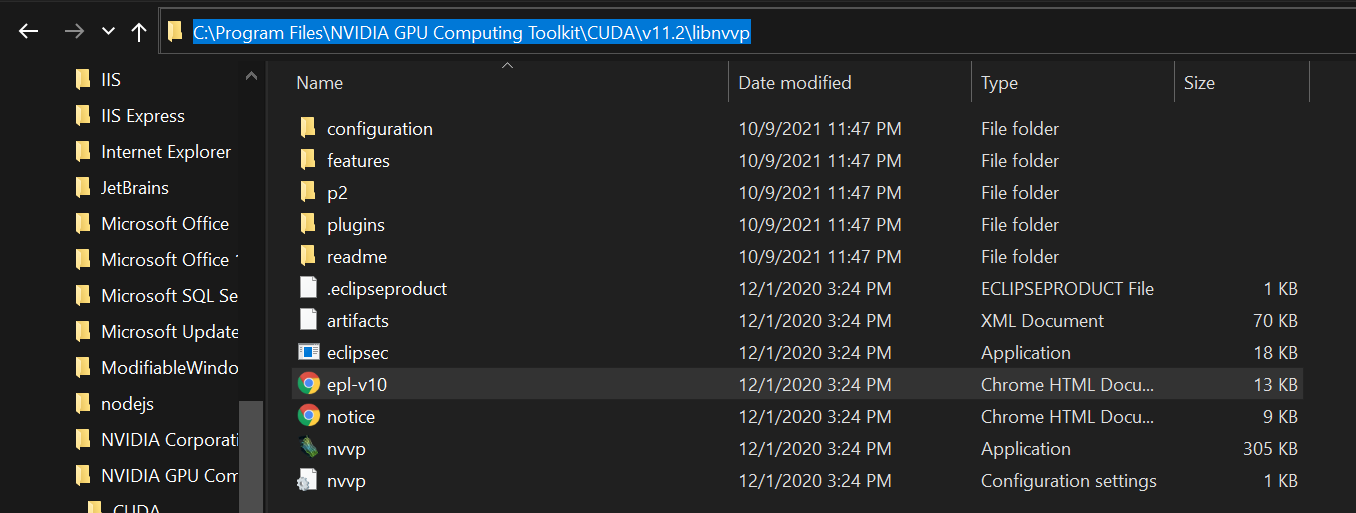
Copy its path and paste it to Environment variables just like you did with the bin binder. Then, close all popular-ups, saving the changes.
Step seven: Install TensorFlow inside a virtual surround with Jupyter Lab
Finally, we are set up to install TensorFlow. Create a virtual environment with your preferred bundle manager. I use conda, and then I create a conda environs named tf with Python version 3.8.
            conda create -n tf python==3.8
conda activate tf
pip install --upgrade tensorflow
pip install jupyterlab ipykernel
Information technology is important that both TensorFlow and JupyterLab are installed with either pip or conda. You volition go a ModelNotFoundError in JupyterLab if they are installed from different channels.
Next, we should add the conda environment to Jupyterlab so that it is listed as a valid kernel when we launch a session:
ipython kernel install --user --name=<name of the kernel, `tf` for our instance> If you launch JupyterLab, you should be able to see the surround as a kernel. Create a new notebook and run this snippet to check if TF tin detect your GPU:
            import tensorflow equally tf
from tensorflow.python.client import device_libprint("Num GPUs Available: ", len(tf.config.list_physical_devices('GPU')))
device_lib.list_local_devices()
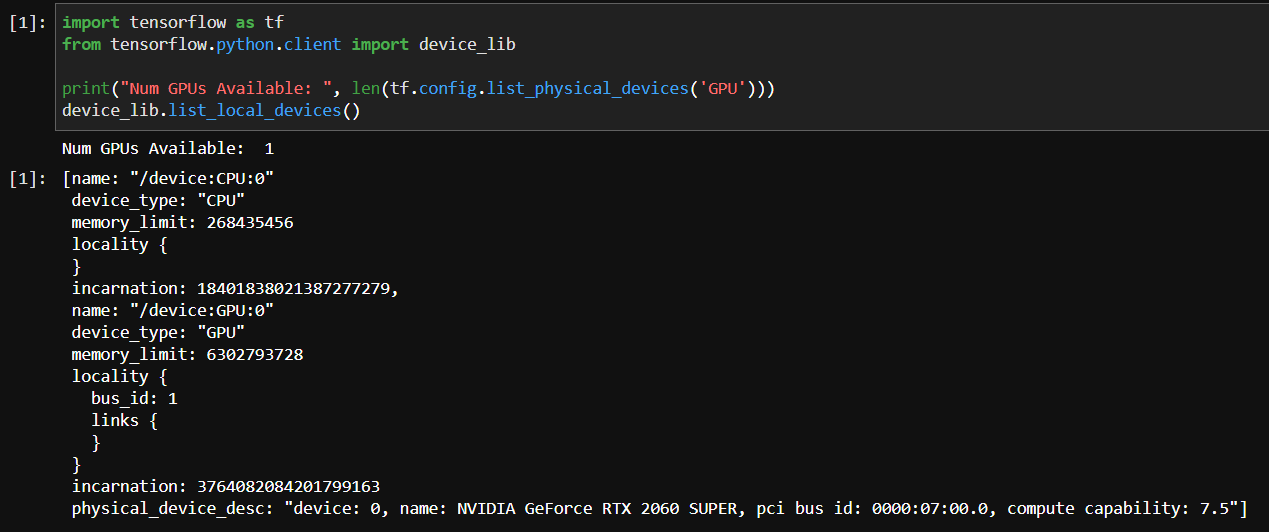
As the output says, I have a unmarried GPU and at the end, it shows its proper noun. If yous have a similar output, then my job here is done!
Instructions were taken from this alive-saver YouTube video.


Source: https://towardsdatascience.com/how-to-finally-install-tensorflow-gpu-on-windows-10-63527910f255
Posted by: partridgevered1971.blogspot.com
0 Response to "How To Install Tensorflow On Windows 10"
Post a Comment